Monday, April 15, 2013

Healthy Tangerine "Creamsicles"


These are SOOOOO yummy, and HEALTHY! 

Tangerine “Creamsicles” Recipe

Ingredients
7  mini tangerines (or roughly 1 cup of orange or tangerine juice)
7 Tbsp Greek yogurt
1 tsp vanilla extract
¼ cup milk
¼ cup cooled brewed raspberry white tea (or other tea, juice, or more milk)
Adjust liquids to increase volume if needed
Sweetener to taste (honey, agave nectar, stevia, etc.) *optional*

Cut mini tangerines in half width wise, and remove peels. Place mini tangerine pieces, yogurt, milk, tea, and vanilla together in a blender or food processor. Blend until very smooth. This recipe leaves the pulp in, so you do get texture in your pops. I don't mind, since I am happy to have the extra fibre, but if you want popsicles that have a more traditional smooth uniform texture - ie. you don’t want pulp - you may choose to replace the tangerines with pulp-free orange juice, or use more mini tangerines and squeeze the juice out of them before adding other ingredients. 
Pour mixture into popsicle molds and place in freezer for several hours or until solid. 
Makes ~6-7 popsicles.

Nutritional Info for Tangerine “Creamsicles”*: 

mini tangerines
7
0
259
vanilla greek yogurt
7T
3.9
127.8
2% milk
1/4 c
1.25
32.5
vanilla extract
1tsp
0
0
raspberry white tea - brewed
1/4 c
0
0
per batch
5
419.3
per pop (1/7th of batch)
0.7
59.9


*Calories are figured out for recipe as is, without added sweetener.

Make Your Own Greek Yogurt!


I love Greek yogurt. I LOVE, love it. I love how rich and creamy it is, without being fattening or calorific. I love how when I eat it, I feel like I am having a decadent treat, but I'm actually eating a snack that is ultra healthy - packed with protein, calcium, and other essential nutrients.

What I don't love about store bought Greek yogurt is the price. A regular sized tub (~1/2 L) can cost anywhere from $5.00-$7.00. The other thing I don't love about store bought Greek yogurt is the artificial flavourings, fillers and other additives some brands contain.

But there's good news! Greek yogurt is easy and inexpensive to make at home. I made my own the other day, and it is rich, creamy, and soooooo decadent. Best of all, it cost only ~$1.50 - $2.00 per 1/2 L to make it at home!

Here's how I did it:

You will need:
A big pot, with a lid
A large mixing bowl
A large sieve, or collander that fits over your mixing bowl
Thick paper towels (~ 3 pieces), cheesecloth, or very clean dish towel, to act as a fine strainer
A kitchen thermometer that can read from 100° F - 180° F
A whisk

Ingredients
Milk (I used 2L to get 1L of yogurt)
1 Tbsp Plain yogurt per L of milk (choose a brand that you love, to achieve similar results, and make sure that you choose one that is as fresh as possible, and contains live active culture. Ex. Danone).
Vanilla (~1/2 Tbsp per L yogurt) *optional*
Sweetener to taste (brown sugar, honey, stevia, agave nectar, etc.) *optional*
Fruit preserves *optional*

1. Pour the milk into the large pot, and stirring frequently, heat to 180° F. Make sure you scrape the bottom of the pot frequently, to prevent burning. OR you can heat your milk in a microwave for ~ 17 minutes according to  this video tutorial  Which is a really great instructional video.
EDIT: I tried a batch using the microwave to heat the milk, and it didn't come out quite right. It was kind of goopy after incubating. It took twice as long to strain, although it did set alright and was ok the next day (not goopy any more), but definitely not as rich and creamy as my first batch. The only other thing that was different, was that I used a different oven, so perhaps the light was not as warm and incubation wasn't as effective? Either way, use the microwave at your own peril, I can't vouch for the results, as I didn't get great results when I made it this way.

2. Once your milk has reached 180° F, cover it and let cool to ~100° F  or just slightly warmer than room temp. Then add approximately 1 Tbsp of live culture yogurt to the milk, to inoculate the milk, and stir it well.

3. Warm your oven to ~ 100° F, and turn on the oven light. Place your covered pot of inoculated milk into the warmed oven, and let incubate for ~6-12 hours. I also wrapped my pot in a dry dishtowel to provide additional insulation. If you make your yogurt before bed, it should be ready to strain by the time you wake up in the morning. When it is ready it should jiggle like jello, and be fairly thick and chunky.

4. Once your yogurt has finished incubating, prepare the strainer. Place the colander or sieve over a large bowl, and line with two layers of paper towels, a cheesecloth, or a very clean dish towel. Spoon your yogurt into the strainer very gently, to prevent losing solids, or ripping your paper towel. Once the bottom of the strainer is covered in yogurt, you may gently pour the rest of the yogurt into the strainer.

5. Cover your filled strainer with another paper towel, to reduce the amount of airborne stuff landing in your yogurt. Then place it into the fridge to strain for ~ 45 mins to 1 hour. You may need to empty the catch bowl of liquid whey part way through. When finished, you should end up with roughly equal parts yogurt and whey.


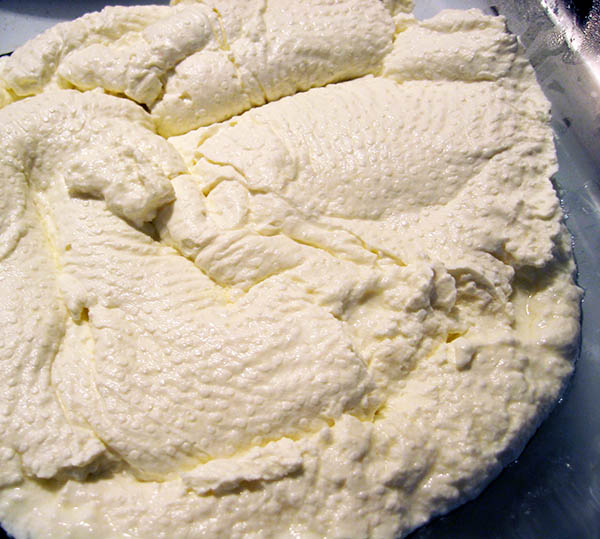
6. Pour your whey into clean jars to use for other purposes, such as in baking. Uncover your yogurt, and dump upside down into the large bowl. Gently remove the paper towel, cheesecloth, or dishcloth (the top left picture shows my yogurt once I removed the paper towel. You can see how firm it is and even the slight impression of the paper towel on the yogurt ;-)

7. With a whisk, whip your yogurt until nice and smooth. It is now ready to be poured into clean storage containers, if you prefer plain yogurt, or you may add sweeteners, vanilla, or fruit for flavoured yogurt. For my vanilla yogurt, I created a simple vanilla syrup by combining ~ 1/2 cup of demerrara sugar with a splash of whey and vanilla in a saucepan, over med-low heat, until the sugar was melted. I then whipped this into my yogurt, before pouring into storage containers. You can save a few Tbsp of yogurt as a culture for your next batch, and can store it even by freezing it.


8. Refrigerate yogurt for ~4 hours to let it set before consuming. Enjoy!


Saturday, April 13, 2013

Healthy Homemade Pizza Pops


My hubby LOVES pizza pops. He would eat them every day if he could! The problem is that they are loaded with preservatives, artificial flavouring, unhealthy fats, refined flour, and lots of calories. So tonight I made my own healthier version. This recipe makes a batch of ~15 4-5" pizza pops, so there will be plenty left over to freeze and have for quick and convenient meals.

Ingredients:
Pizza dough (enough for 2 pizzas) - I used this recipe and subbed whole wheat flour for my crust.
~ 2 cups Pizza sauce (  Here's a good homemade sauce recipe)
~ 2 cups Shredded Mozzarella Cheese (use reduced fat mozza for lower calories)
1/2 Small Onion (diced)
1-2 Cloves Garlic (minced)
Other topping options include chopped tomato, spinach, feta cheese, lean ham, fresh pineapple, bell pepper, jalapenos, mushrooms ... etc.

Prepare pizza dough according to recipe. Form into a thick round patty and cut into ~ 15 equal pieces. Roll these into balls, place back in a bowl and cover with a tea towel to prevent them from drying out. Preheat oven to 375°.
Grab one dough ball and roll out very thin ~1/2 cm thick. In the center place ~ 2T sauce, a tiny amount of onion, garlic, and veggies/meat/whatever you like, cover with ~2T of mozzarella. Carefully fold edges of dough together, pinch all the way around, and then fold edge over and pinch again. Lightly oil a baking pan with olive oil. Place each pizza pop on the pan. When you are about 1/2 way done filling the pizza pops you should have one pan full.
Bake pizza pops for 15-20 minutes, or until crusts are lightly golden brown. Remove from oven and let stand on tray for ~ 10 minutes, then transfer to cooling rack.
I haven't frozen and reheated my pizza pops yet, so I don't know the exact time. But I am going to bake them at 375° for 15-20 minutes, or until hot and golden browned. You could also microwave them for 1-2 minutes or until hot. Let sit for several minutes after re-heating.

I filled mine with regular fat mozza, pizza sauce, onions, garlic, spinach, and fresh tomato. When I calculated the fat & calories they came to 5.6 g fat, and 140 calories each (about 1/2 the fat and calories of regular pizza pops).
Om nom nom! These are SO DELICIOUS! Way tastier and more filling than store bought pizza pops - and HEALTHIER of course~


Tuesday, March 05, 2013

Dragon Tattoo

This is just a quickie post to show you all the finished version of the WIP I posted last time.
If you are interested in the tools that I used to draw this, check out the previous post, as I've listed and photographed them. The only thing to add is that I used a black charcoal stick to get the deep black of the clothing, without using up my pencils.

Here it is! Dragon Tattoo


Sunday, March 03, 2013

Charcoal Portraits - practice, practice, practice

Lately, I've been working on my drawing skills. I have been drawing for years, since as far back as I can remember, really. I used to draw all of the time, but about ten years ago, knitting took over my life. As a nasty case of carpal tunnel has stopped me from knitting, I have turned back to other artistic pursuits, and recently began drawing again more seriously. I began by using an old set of Derwent Graphic pencils (H - 9B), but found that I was fighting against smudging, graphite shine, and a lack of depth (due to an inability to create a true black with graphite). After some great advice from other artists, and studying some portrait instruction texts, I switched to primarily using charcoal pencils.  I still use a graphite mechanical pencil to do the layout sketch, and some of the eye detail, but the rest is done with charcoal pencils, which give greater depth and impact than graphite.
 Here's a portrait I recently did of Sheldon Cooper, from The Big Bang Theory.


Here is a pic of the tools that I use. I find that I sharpen my pencils frequently, or I use a foam sanding block to sharpen the tips (not shown here). You can pick up foam sanding blocks from any hardware store. Mine was ~ 1.5" thick x 3" wide, and I can't remember how long it was, but I cut it down to approx 1.5" long. I also use a regular Ziploc sandwich bag to catch the pencil and charcoal shavings. 

This picture is of Mikael Blomkvist (as played by Daniel Craig), from The Girl With The Dragon Tattoo. This is a WIP that will include a profile of Lisbeth Salander (as played by Rooney Mara), and is from the movie poster.

For these portraits, the layout sketching, and the iris detail was done with the mechanical pencil (HB graphite), the light portions were mostly done using the General's Charcoal HB-hard, while the darker portions were done using the range of Primo Charcoal pencils. The darkest parts were achieved with the Derwent Charcoal -Dark pencil.
I always use a spray-on Workable Fixative to keep my work from smudging, and I also place paper towel over the finished portions while I am working on other parts of the image to prevent hand-smudging.
For info on pencils, and techniques for portrait drawing, check out J.D. Hillberry. He's pretty commercial, and I don't always like his subjects, and composition, but his book and youtube videos have some good info on realistic drawing techniques.

Wednesday, February 20, 2013

Sew Geeky - how to make a dice bag


This next project is a perfect gift for the game geek you love, or make it for yourself! 
Nothing says "Shiny!" like your own personalized dice bag, & it is oh sew simple to make.
The pattern is for a simple fabric drawstring bag, which can hold many little treasures, not *just* dice, for you non-gamers out there.
*Click on the pattern images to enlarge*


 Personalize your bag with an awesome pic, quote, or meme! When using printable iron-on-transfers, don't forget to reverse your image prior to printing, so the writing doesn't come out backwards.

This pattern is copyright Vanessa Carter 2013
www.knit-fish.blogspot.com

Terms & Conditions:
You are welcome to use this pattern to sew items for yourself, for charity, and for gifts. You
may not distribute this pattern for free or for sale. 
Happy Crafting!

Monday, February 18, 2013

How to plan a crafternoon

This little project has been hanging out for a very long time, but I never blogged about it. I think this might have been my first 3D felt project! I made it at a needle felting craft night with the girls. My talented friend, Robin, knew all about needle felting, and had an inspiring book with lots of projects in it. She hosted a craft night and taught us all the basics of needle felting, and we each went home with our own adorable little felt item(s).


If you've never had a craft night, or crafternoon, here's how I do it:

1. MAKE A LIST of people who you love to spend time with, who are also crafty.

2. CHOOSE A CRAFT PROJECT or make it a bring your own project event. Keep in mind that while some people love the organization of a one type of project for all event, where one person directs or teaches and everyone else makes the same or similar items, some people like to do their own thing, and feel restricted by this. Another option is to have a variety of craft supplies available for people who want to just follow their own creative flow. It is always a good idea to take a vote on project types if you choose to do one type of project for everyone.

Here are some crafty ideas:
Needle felted animals
Sewn felt food
Terrariums!
 And a whole bunch of crafty projects
 More ideas include making papercraft gift cards, hand stamped gift cards, hand painted nesting dolls, small decoupaged items, small watercolour paintings, small sewn felt or fleece projects, small knitted or crocheted projects, decorated magnets, or scrapbook pages.

Pick a Project for Success!
The key is to choose a craft that will fit your time frame, and everyones skill level. Unless you've got a group of expert level crafters, you want to keep it fairly simple. For example, don't choose a knitting project, if some of your guests can't knit, unless you are having a crafternoon specifically to learn the basics of knitting.
If you are doing a tutorial, keep it brief, so people can get to the fun part: crafting!
Keep in mind that people craft at different speeds, and you don't really want your guests to go home with incomplete projects. So when in doubt, choose something small, then if there is time left over, your guests can make several items.

3. SEND OUT INVITES by mail, email or make a facebook event: be sure to include these elements...

When?
You may choose to select several dates and have your friends vote on which works best for them. Otherwise, weekends afternoons often work well, or evenings on weekdays. Choose a time that works best and allow around 3-4 hours for the event to take place, depending on the craft you choose. Keep in mind that you will need to factor in arrival times, time to eat and chat, time to plan out projects, time for a tutorial (if some people haven't done the particular craft before), and time to craft! I would allow for about 1 - 1.5 hours for everything up to the tutorial and crafting.

Where?
It could be your home, ask for a volunteer to host if you can't, or take it to a local cafe or public space (imagine a picnic in the park crafternoon!)

What to bring?
I often make my crafternoons potluck, and ask everyone to bring a dish to share. I usually provide tea, and other beverages. I also either ask for each person to bring $5 to cover the cost of craft supplies, if I am picking up supplies, or to bring their own craft supplies. Make sure you have extras of tools that everyone will need such as scissors, glue, sewing needles, pins, etc. Or you can ask that people bring their own.

4. HAVE FUN! Remember, the aim is just to have fun crafting with friends. Don't put too much pressure on for everything to be perfect, and just enjoy the time :-)


Tuesday, January 15, 2013

I felt like a hummingbird...

The world of needle felting is something that I picked up during my time working at my LYS (that's Local Yarn Shop for the uninitiated). It began with a little pin,   which I blogged about here. Now I have moved on to more complex three dimensional shapes.... which you are all dying to see... so here you go!
This little hummingbird was made for my mom for her birthday.
I began with an ovoid body shape (made of the blue roving), and began to add the head shape through strategic needle work. Eventually I added the belly colour, and shaped the tail. Finally I worked on the wings separately , folding sections of roving into rough triangle shapes and working them from there into wings, then attached them to the main body, again, with the needle.


I think my experience working with clay really helped me out with this, because I am used to creating three dimensional shapes. It was just a matter of changing the medium and getting used to the technique of the felting needle. I use single needles to make my creations, in sizes 26, 28, and I think 30 or 31.
The first hummingbird was made from  Fleece Artist 100% Merino Sliver in the Mermaid colourway (for the head, back, wings, and tail), and 100% Merino Sliver in what I *think* is the Blomidon colourway  (for the belly). The beak is made from another part of the Mermaid colourway.

The second little hummingbird was made on commission for a friend. It is made of gorgeous  Fleece Artist Merino Silk Sliver in the Aurora colourway (for the head, back, wings, and tail), and 100% Merino Sliver in what I *think* is the Blomidon colourway  (for the belly). The beak is made from some left over dark purple roving I had lying around. The eyes of both birds are made from little blue glass beads, sewn in after I needle felted little holes for them to go into.
If you enjoyed this post about needle felted hummingbirds, check back later as I will be posting more of my creations soon. I am also planning to do a tutorial post, at some point, where I will go through the process step-by-step.